Sanitation Storage Solutions: Conservancy Tanks

Store and dispose of both black and grey water with our Conservancy Tank Solutions.

Conservancy Tank Solutions

As it is chemical-resistant, conservancy tanks are used to dispose of both black and grey water. It serves as temporary storage only, requiring the waste to be pumped out whenever the tank is full. This is done by licensed hauling companies who dispose of the waste accordingly.

Septic Tank Conservancy Tank Benefits

  • Minimum maintenance required (except for the periodic emptying of the tank)
  • Provides a safe temporary storage solution for black & grey water
  • Flexible and adaptable to meet a wide variety of individual household waste disposal requirements

System Components

Conservancy-Tank-System-Components

1. Tank

Underground/conservancy tank – size as required. All conservancy tanks are supplied standard without fittings, as the contents need to remain inside the tank until pumped out.

The required volume will depend on how often the tank will be pumped out and the amount of people using the facilities on a daily basis.

To calculate your required size, take the below numbers and multiply with the amount of people:

Hand/Face Wash: ± 1-4 L
Toilet Flush: ± 3-7 L
Bath: ± 50-150 L
5 min Shower: ± 80 L
45kg Laundry: ± 80 L
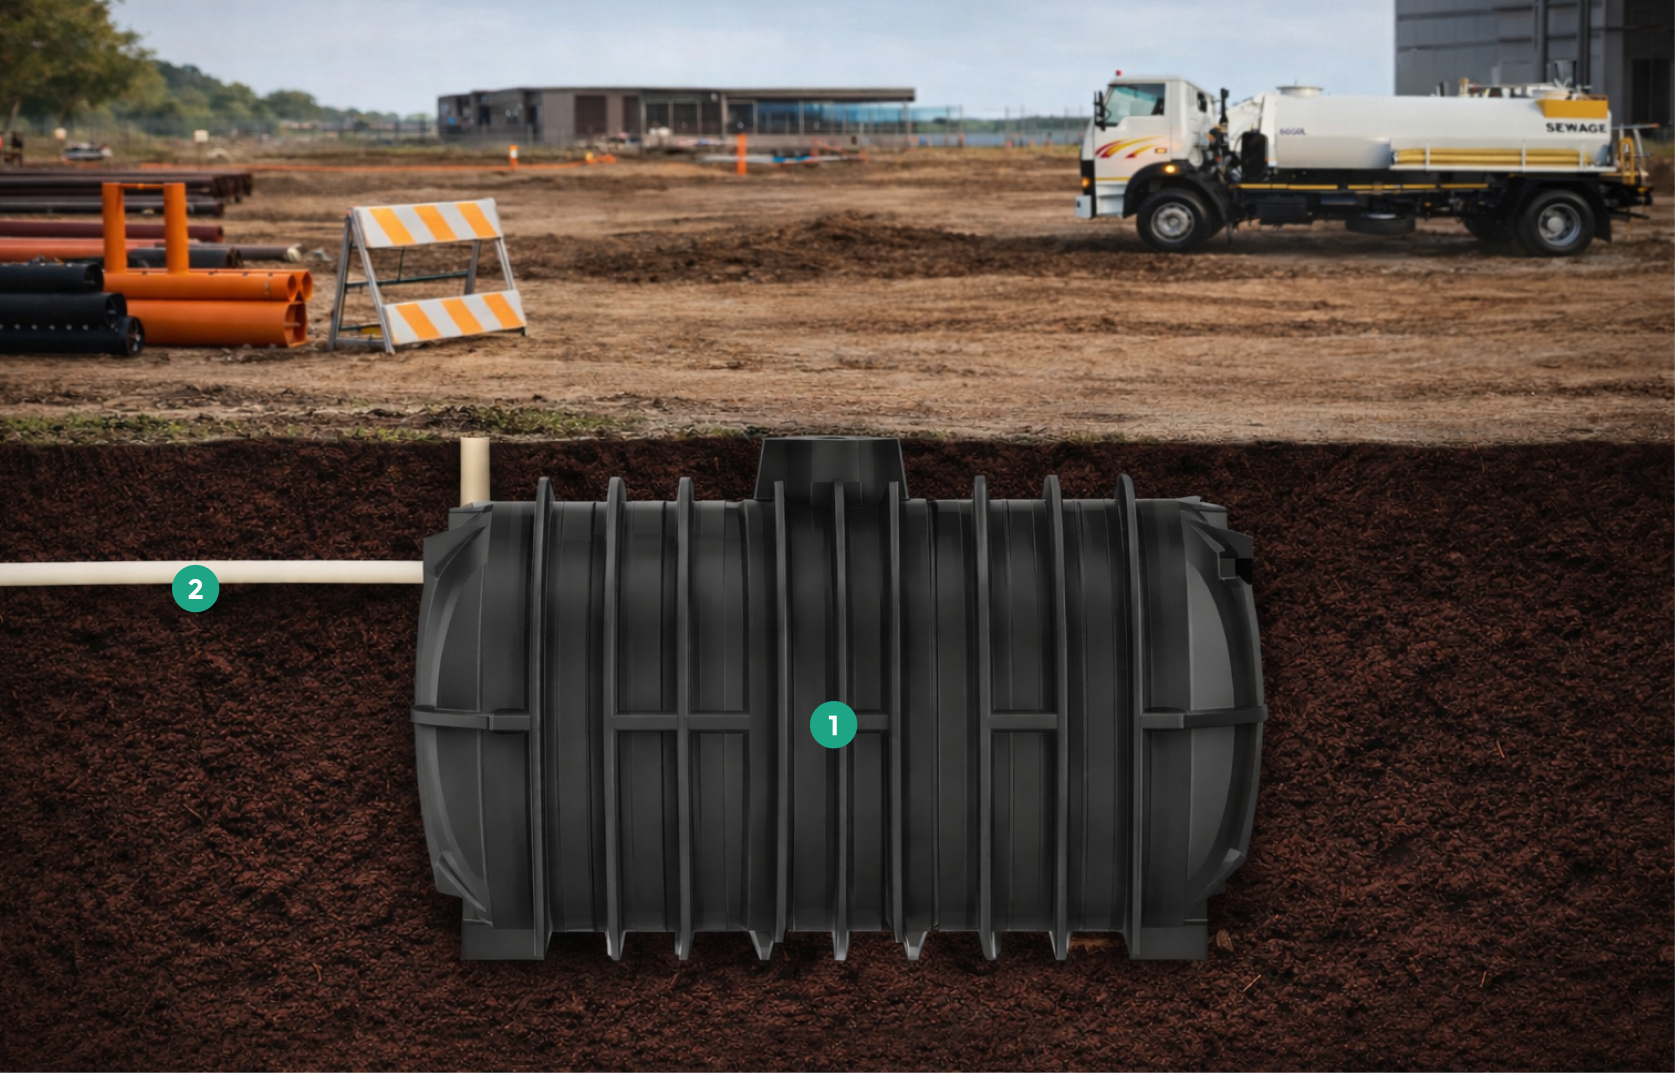
2. Pipes – 110 mm SV pipes

Lengths will vary based on the installation.
2a. From feed from house to the first elbow
2b. From first elbow to elbow extending out of the tank

3. Elbow – 110 mm

According to pipes

Note

This is a guideline for a basic installation. Each installation will vary based on the setup and personal preference. It is advised to make use of a professional for an installation this complex.

Maintenance

Although conservancy tanks are fairly maintenance-free, there are a few things you can do to ensure that your system functions properly.

1. Ensure that proper installation procedures are followed.

It is vital to follow all installation guidelines and manufacturer specifications to ensure proper functionality and reduce maintenance after installation.

2. Ensure lid remains in place.

When installing the tank, the lid is filled with concrete prior to use to ensure that it stays closed off. It is, however, important to double-check every now and then to make sure that nothing falls into the tank or no effluent leaks out of the tank (effluent is not safe and carries disease-causing germs).

3. Keep a watchful eye.

If you notice any of these warning signs, contact a professional septic company/preferred installer immediately for assistance:

• Surfacing sewerage or wet spots
• Gurgling sounds in the plumbing system
• Slow draining fixtures

Installation guide

PRE-INSTALLATION: PART 1

1. Tank placement

The location of a conservancy tank should be considered and it must be placed on soil with a bearing capacity greater than 120 kPa.

Avoid installing the tank:
• In water-saturated clay or an area that is frequently flooded
• Where depth to bedrock is less than 2.5m
• In the path of vehicles/heavy equipment
• Where underground services are expected (i.e. electric cables, water and sewer pipes, gas lines, etc.)

2. Soil Classification

If bearing capacity cannot easily be determined, use the provided method of soil classification, which will also assist in determining suitable backfill material.

CategoryBearing CapacityVisual AppearanceSqueezed in hand & pressure released
RockYesSufficient– Rock, Slate, Shale etc.
Coarse-grained soil: GravelYesSufficient– Coarse to very Coarse
– Small stones & particles
– Free-flowing
Coarse-grained soil: SandYes
No
-Coarse/medium sand is Sufficient
-Fine sand is NOT Sufficient
– Granular appearance (individual grain sizes detectable)
– Free-flowing when dry
– Lighter to brownish colours
– Won’t form a cast when dry & falls apart
– Wet cast crumbles when lightly touched
Fine-grained soil: SiltNo– NOT Sufficient– Very little fine sand
– Cloddy when dry & soft flourlike feel
– Readily pulverises to powder
– Darker colours (green, blue & black)
– Cast can be handled without breaking
– Readily puddles when wet
Fine-grained soil: ClayNo– Hard homogeneous clay may be Sufficient
– clay is mostly NOT Sufficient
– Fine textured, breaks into very hard lumps when dry
– Difficult to pulverise into soft flourlike powder
– Cohesive when moist & shrinks when drying
– Darker colours (green, blue, black & orange)
– Cast can be freely handled without breaking
Highly organic soilNoNOT Sufficient– High organic content (often decomposed)
– Plant remains/woody structure easily recognised
– Mineral soil finely divided with fibrous remains
– Occur in lowlands, swamps & swales
– Dark or black in colour

PRE-INSTALLATION: PART 2

1. Excavation Process

When excavating be aware of:

a. The surroundings
Take care not to damage any underground services (telecommunication, electrical cables, water/sewer pipes, gas lines, etc).

b. The natural elements
If ground water is present in the excavation hole, continuously pump out the water during the installation process.

LOCATIONDESCRIPTIONEXCAVATION DEPTH
Soft in-situ soil– Fine sand, silt or clayMin 420mm/max 720mm deeper than the tank’s height
Non-load bearing– No ground water will affect the tank
– No traffic will pass over the site
Min 120mm/max 720mm deeper than the tank’s height
Load bearing– Ground water will affect the tank
– Traffic will pass over the site
Min 420mm/max 720mm deeper than the tank’s height

2. Prepare the tank bed

The bedding is the foundation on which the tank will be installed. The type and thickness of bedding will vary, choose the correct process relevant to your setup.

TYPETHICKNESSPROCESS
a. Rocks/Rocky soils– Minimum 150mm crusher dust or a coarse sand/gravel mixture
– Bedding to be thicker where hollows or uneven areas are levelled out
– Remove all large/loose rocks and objects that could interfere
b. Dry installation
Gravel/Coarse sand (no ground water)
– 150mm crusher dust or a coarse sand/gravel mixture
– Stabilise bedding layer with 3% cement (1½ bags 50kg cement)
– Spread cement evenly and compact, using mechanical compactor
– Do no wet cement, as the natural moisture from the ground will do this over time
– If the soil is too dry to form a lump when pressed in your hand, add a little water but ensure lump still crumbles when lightly touched
c. Dry installation
Soft in-situ soil – fine sand, silt or clay (no ground water)
– 2 x layers of 150mm crusher dust or a coarse sand/gravel mixture each
– Stabilise bedding layer with 3% cement (1½ bags 50kg cement)
– Spread cement evenly and compact, using mechanical compactor
– Do no wet cement, as the natural moisture from the ground will do this over time
– If the soil is too dry to form a lump when pressed in your hand, add a little water but ensure lump still crumbles when lightly touched
d. Wet installation (ground water will affect the tank) – Drainage bedding layer of 150mm crushed rock (19mm), use crusher dust or a coarse sand/gravel mixture
– Stabilise bedding layer with 3% cement (1½ bags 50kg cement)
– Spread cement evenly and compact, using mechanical compactor
– Do no wet cement, as the natural moisture from the ground will do this over time
– If the soil is too dry to form a lump when pressed in your hand, add a little water but ensure lump still crumbles when lightly touched

2. INSTALLATION

Conservancy-Tank-Installation-Step-One

Drill a hole in the designated area (see image above) with 111mm hole saw
or a jig saw for pipe to enter at the top of the tank.

Conservancy-Tank-Installation-Step-Two

Fit pipe and elbow to inlet and seal with window putty or pan connector sealer
to ensure no leakage once final installation is complete.

Conservancy-Tank-Installation-Step-Three

Carefully place the tank on top of the prepared bedding in the designated excavated area.

Note: the direction of flow (inlet) and place according to setup.

Conservancy-Tank-Installation-Step-Four

NB: the backfill procedure differs based on the size of the conservancy tank used.

It is vital to follow the correct procedure to ensure the tank does not get damaged (see steps 5 to 6).

Conservancy-Tank-Installation-Step-Five

For the 6000L tank – fill the tank with 150mm of water, then backfill 150mm around the perimeter of
the tank. Compact the layer and repeat the process until at least half of the hole is filled.

Conservancy-Tank-Installation-Step-Six

For the smaller range – fill the entire tank with water, then backfill in layers of 150mm around
the perimeter of the tank, compacting each layer before laying the next. Continue until halfway.

Conservancy-Tank-Installation-Step-Seven

Before commencing with the rest of the installation,
it is vital to ensure that the soil is properly compacted.

Conservancy-Tank-Installation-Step-Eight
Fill tank lid with concrete (allow concrete to cure) and put the lid in place.

Conservancy-Tank-Installation-Step-Nine

Connect feed from house (black and grey water) to the elbow extending from the inlet at the top of the tank.

Note: it is advised to make use of a local plumber to handle all plumbing requirements.

Conservancy-Tank-Installation-Step-Ten

Backfill the rest of the hole with suitable backfill material. Refer to steps 5 to 6
to ensure correct procedure is followed based on the size of the tank used.

Conservancy-Tank-Installation-Step-Eleven

We recommend installing a manhole for easy access when necessary.

Conservancy-Tank-Installation-Step-Twelve

Find a local licensed hauling company and keep their contact details at hand.